
Taking, Preparing, and Submitting a Soil Sample for Testing
Amy Barkley, Livestock Specialist
Southwest New York Dairy, Livestock and Field Crops Program
Soil testing is the easiest way to identify and quantify nutrient imbalances in our agricultural soils. Tests will identify major nutrients such as nitrogen, phosphorous, and potassium as well as pH, organic matter, and some micronutrients.
Timing:
Samples can be taken in either the fall or spring. They should be taken following crop removal, prior to planting and/or fertilizing, or before green-up in the spring. A soil testing schedule should be established to help understand nutrient levels and how they change over time. It is recommended to test soils before planting a crop in an area that has not been tested before. Once there is an understanding of the soil quality and a crop has been established, soil tests should be taken every 2 years if planting annual crops such as corn, soybeans, or vegetable crops, and every 3 years if the field is planted in a perennial crop such as pasture or an orchard. This will allow for the regular identification and correction of nutrient deficiencies.
Where to Sample:
Each individual field, pasture, or parcel should be tested separately, since management styles and naturally occurring differences due to field location and soil type will impact soil structure and nutrition. If a larger field exceeds 15 acres, it is recommended that field be divided up into 15-acre parcels, with each tested separately. When dividing fields, there can be natural divisions, such as upland vs lowland or recently cleared vs previously cleared areas. These areas should be tested separately anyway, since large changes in topography or field age can influence soil type and nutrient content. Other areas that should be either tested separately (if they are going to be planted) or left out of a sample include: low spots; areas against a stream, pond, or livestock waterer; eroded areas; areas with obvious changes in soil type or structure; areas where wood piles have been recently burned; and old fence rows.
A soil sample is made up of 10-15 core samples from a single field or area. When taking cores, the pattern of sampling should allow for the most representative sample. Sampling in a random pattern, diagonal line, or zig-zag pattern is most representative. It is not recommended to sample in a straight line across the center of a field or to sample all in one area. These two techniques will yield non-representative samples, which will skew results.
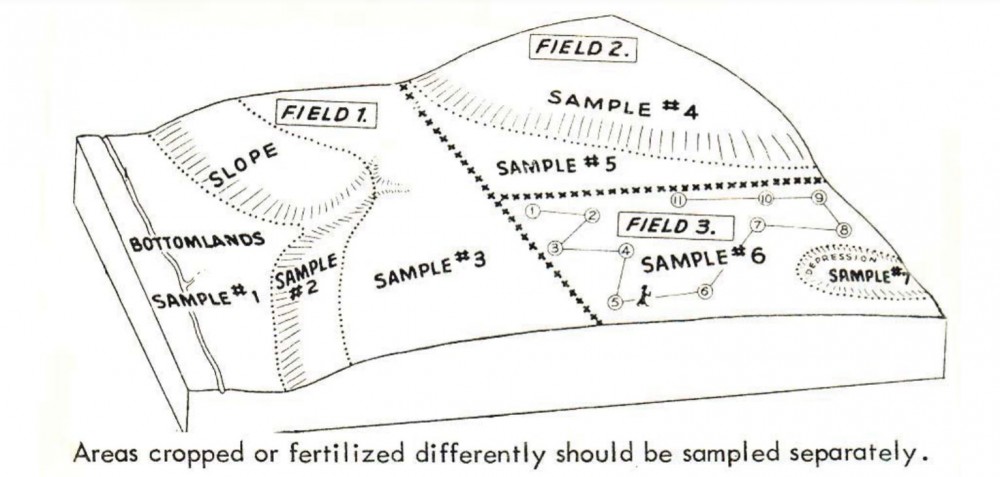
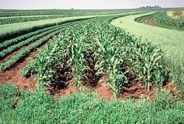
Photo from UGA Extension.
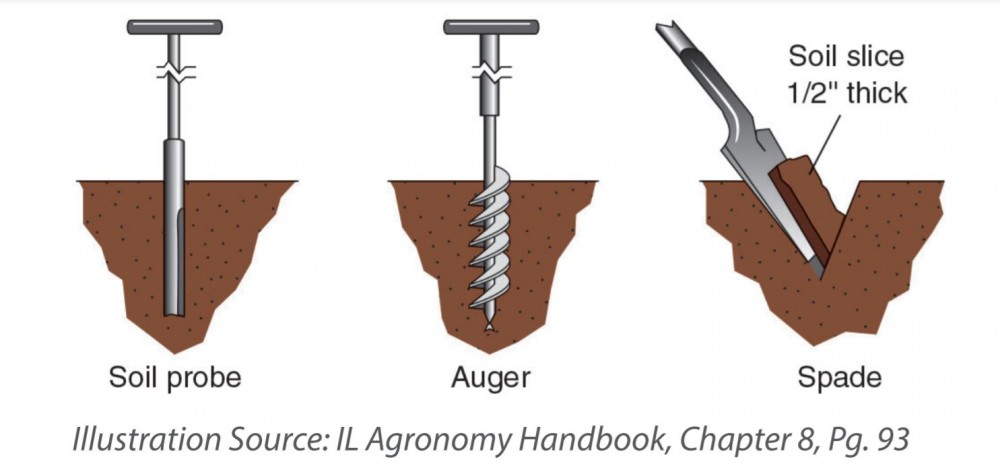
Equipment needed:
To take a core sample, a soil probe, auger, or spade can be used. A bucket for each sampled field will be needed to contain and mix the core samples.
Taking a sample:
Each parcel or field sample will be made up of 10-15 core samples. Core samples are vertical slices or tubes of soil which represent the depth of soil which has the potential to be amended. The core sampling depth will depend on the crops to be planted in the next three years. For pastures, no-till fields, or gardens, test 4-6 inches down. Plowed field sampling depth is the depth of tillage. Orchards will need samples between 8-14 inches in depth, depending on the species present.
Before taking the sample, remove any organic matter from the soil surface. This can be stubble, leaves, or pasture plants. Next, if using a soil probe or auger, insert or twist until the pre-determined sampling depth is reached, then take the core sample and add it to the sample bucket. If using a shovel, dig a straight-sided hole to the depth to be sampled. Then, take a 1-2" slice of soil straight down along the side of the hole. Remove the excess soil on either side of the blade, leaving a 1-2" wide core of soil in the center. This is the core which is then be placed in the bucket.
Preparing the sample for submission:
Once the core samples are collected, break them up to create a uniform mixture of soil. At this point, remove any large roots, rocks, or pieces of organic matter remaining in the sample.
If the soil lab being used requests it, the sample can now be dried. Drying is achieved by spreading each mixed sample separately out on a sheet of newspaper, cardboard flat, or sheet pan, and dried at room temperature. If desired, a fan can be used to help speed up the process. It is not recommended that the sample be heated to dry it, as this may alter the test results. The drying process will take about 72 hours. Every 24 hours, thoroughly mix the sample to speed up drying and to help mix it further.
Once the sample is dry, place 2-3 cups of it into a sealable bag labeled with your name, the date the sample was taken, and the field ID. This should match what is entered on the sample submission form and should match your records. The bag can be a Ziploc, whirl-pak, or bag that comes with a soil test kit.
Filling out the submission form:
Complete all parts of the sample submission form, including field characteristics, prior crops, future crops, and soil type. Soil labs will typically have a key on the submission form to use to fill out soil characteristics, as well as a list of crop codes to select from to identify which crops have been planted prior and which are anticipated to be planted in the future. Soil name is a vital component, especially for those submitting samples to Dairy-One. This is because Dairy-One maintains a research-based repository of fertilization needs based on crop and soil type for farms in New York. This information allows the lab to make precise recommendations, which takes out the time needed for a farmer to otherwise research and calculate fertility needs. The soil name can be found using the USDA-NRCS (United States Department of Agriculture Natural Resources Conservation Service) Web Soil Survey at https://websoilsurvey.sc.egov.usda.gov. A detailed video explaining how to use the tool can be found at https://www.youtube.com/watch?v=yl2T8DCyY1Y&t=489s.
For more information about soil testing or report interpretation, please reach out to Amy Barkley, Livestock and Beginning Farm Specialist at amb544@cornell.edu or (716) 640 - 0844 or Katelyn Miller, Forage and Field Crop Specialist at km753@cornell.edu or (716) 640-2047.
Field Crops
Dairy
Business
Livestock
Grains
Upcoming Events
WEBINAR - Automated Milking Systems Efficiency: Balancing Focus on Individual Cows and System Optimization
May 8, 2024
Please join Cornell the SWNY team and MSU Extension for our talk with Dr. Pablo Silva Boloña on improving efficiency of Automated milking systems by focusing on milking settings for individual and group success.
Broiler Field Day at Sunny Cove Farm
June 6, 2024
Alfred Station, NY
Join us for a field day to explore broiler production, processing, and finances. Meghan Snyder of Sunny Cove Farm will be our host. She raises small batches of organic broilers, processing them on-farm under the 1,000 bird exemption.
Stockmanship and Stewardship 2024
October 25, 2024
Hamburg, NY
Save the date!! The event is one of 4 across the US and is a two-day educational experience featuring low-stress cattle handling demonstrations, Beef Quality Assurance educational sessions, facility design sessions, and industry updates.
Announcements
No announcements at this time.